
We spend so much time making our creations why not make them look as good as possible on the screen! When posting your creations on your blog a good photo makes a world of difference.. now I'm no expert on this, but I do like to try and get my photos of my creations as nice as possible and yes I'm still learning... Here are some tips and tricks on taking better photographs of your work!!
* Photograph your cards using a digital camera - in a nice bright spot. Best not to have direct BRIGHT sunlight shining on your work though.
*Don’t use your flash... it will bounce off/ fade out your image.
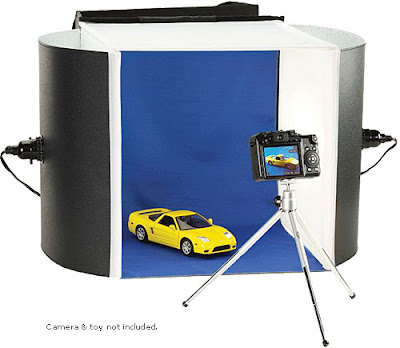
* Use a light box/ tent... you can buy some quite cheaply ... or you can even make your own.. Below is a link to the lightbox/ tent that I use ... but prior to this we had one Guy had made from a cardboard box with tissue paper on three sides and we shone lights through the tissue paper.
* Have a neutral colour as the background... white, grey or blue work well!
* Keep your creations flat .. you could stick to the background with bluetack. Best results are achieved when you can photograph the creation straight on! If the sides are not looking straight then your camera is not positioned squarely in front of the piece, or your work might need to be tilted up or down.
* Use a tripod if possible.. or set up tall objects and use self timer - takes the shake/ blur out!
* Frame your work so that it fills up most of the viewfinder - without cropping off sides/ corners.
* Focus your camera as carefully as possible. It's too hard to correct out of focus images.
... some cameras can’t focus very well at a close distance... check your manual to see the minimum focal distance.
*Use a lower speed setting
*Try using your cameras macro setting! (the little flower picture)
* Take LOTS of pictures to start off with.. take some on different exposures, white balances and you can pick the best one once on your computer! Take different angles to show features/ gloss.
* If you have a scanner you can also try scanning your creations.. although you might still need to edit the photo afterwards...
Once you upload to your computer you can /often will need to edit.
I use Aperture + Photoshop elements but there are a number of free editing programs out there.. find one that works for you... Gimp is a good free one!
Most commonly what you might need to alter are the brightness + contrast and possibly even the white balance - Doing this can make a huge difference to your work. Here's an example...

As you can see I did not frame the picture very well in my original photo .. so in my photo editing program I have cropped it closer to image... framing the work better .. I also adjusted the white balance... it was far too blue.... and I adjusted the brightness and contrast.

Hope that this little tutorial/ tips post is helpful to you in taking pictures of your work! Please feel free to share below in the comments - what things you find helpful in taking photos of your work!
3 comments:
Thanks for the tips! Taking good photos was one of the hardest things about starting my blog. I suggest beginners check out the online site Picnik for shopping their photos. Most of the basic photoshopping elements are free and it's extremely user friendly! Plus, if you like it, there is an option to upgrade to a yearly subscription which unlocks other photoshopping elements. I now use GIMP as well but for the basics Picnik is still my favorite!
Some great tips here. I have a photo tent and wouldn't be without it - EVER!!!! I also use Paintshop Pro photo editing, whilst is isn't the cheapest it is fantastic and I would highly recommend it.
Hugs
Penni
X
Great tutorial Sammi! Thanks so much for sharing!
Arabella
Post a Comment