
Well, of course, we could just leave the image, after all, the cardstock was white - yes? But we want to add depth and shape so the image appears 3d. This is very easy to achieve using our grey Copics.
I have two examples for you today, the first using E's and W's and the second example using only W's. I have chosen the warm greys as they tend to be used on natural materials, such as clothing. Cool greys tend to be used on metals or man made materials. This is not to say that you can only use greys to colour white. On snow people, I tend to use my very pale blues B000 or B0000, but you can use any of the 000 or 0000 numbered Copics from any of the colour families, depending on the "hue" you wish your image to take on.
The first example is this Magnolia wedding couple image. I want Tilda's dress to appear ivory and Edwin's shirt to appear white. As they are standing together, it would look a little strange if their clothes merged in one colour, so I've chosen slightly different colours.

First of all, on Tilda's dress, I have used E50. This is a nice pale cream colour. I have very lightly outlined the edges of her dress, and the under sides of the pleats on the front of her dress

I have then lightly feathered this out with my E000 and to soften those edges, I 've used my blender 0 so there is no harsh edge to the colour.

As the cardstock is white and she is very pale, I want her to stand out from the page. To make something that you have coloured "white" stand out from your white background, you choose a corrosponding colour to outline it. This is a picture of the Copic colour wheel. You can see that I have circled the group of E colours in red and also the B group. These two groups are opposite each other and are contrasting. As I want my outline to be very subtle, I have chosen B0000.

And here you can see the finished image. You can see the very faint B0000 outline and the shape to Tilda's dress. I have also coloured Edwin's shirt using W1 and W0 in the same method.

I have also used W greys to colour this image of Mummy Edwin:

He was a little bit more work, with all of his bandages. I have coloured him with W3, 1 and 0.
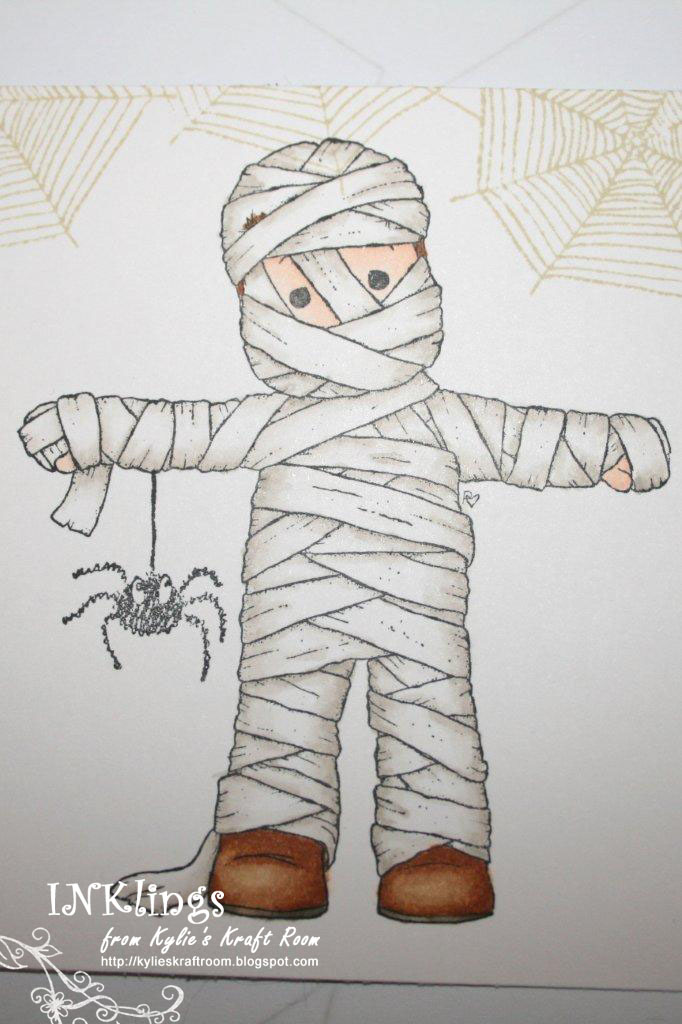
Here you can see a bit more of the detail


I hope you found this tutorial easy to follow and I look forward to seeing some of your colouring on white items soon!
Copics used to complete the images:
Wedding Couple:
Tilda's skin - E11, 00, 000, R00 (blush)
Tilda's hair: E31, YR20, Y23
Tilda's dress: E50, E000
Tilda's flowers: R32, 30, 00, 000, YG 91, 95
Edwin's Skin: E13, 11, 00, 02
Edwin's hair: E57, 55, 31
Edwin's shirt: W1, W0
Edwin's pants: E57, 55, 53
Outline: B0000
Outline: B0000
Mummy Edwin:
Bandages: W3, 1, 00
Skin: E11, 00, 000
Hair: E37, 34
Shoes: E37, 34, 31
Images: Magnolia
8 comments:
Wow, this is a great tutorial, very easy to follow, I am going to have to experiment with my whites, thanks.
Awesome, thanks for the info I was wondering how you did the white colouring:-)
Hugs
Karen
xxxx
Wow, wow, wow, what a fantastic tutorial. I've only recently started out with copics and there is so much information out there. But tutorials like this have me coming back again and again.
Fantastic Tutorial Kylie!!
Thanks for a great tutorial! The tip about the color wheel and opposites for contrast is a gem, thanks again. Time to go practice, practice, practice!
OMG, FANTASTIC, lov elove love what you have done and great Tutorial, thanks.
hugs
Sue x
Excellent Tutorial Kylie, gorgeous work, take careX:)
This is a wonderful tutorial Kylie - excellent work - thanks so much for sharing it.
Post a Comment